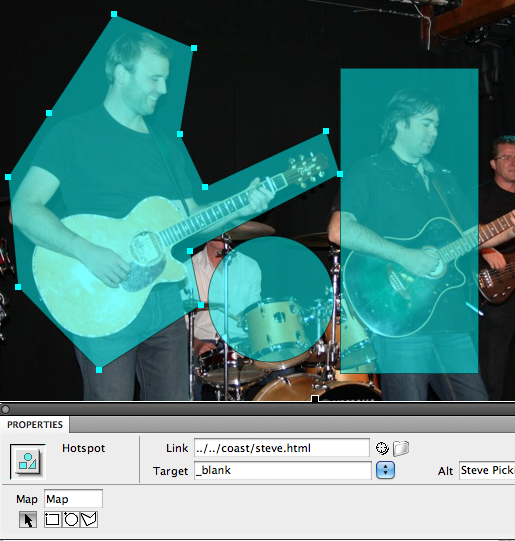
Image map hot spots to create links on specific areas of a picture:
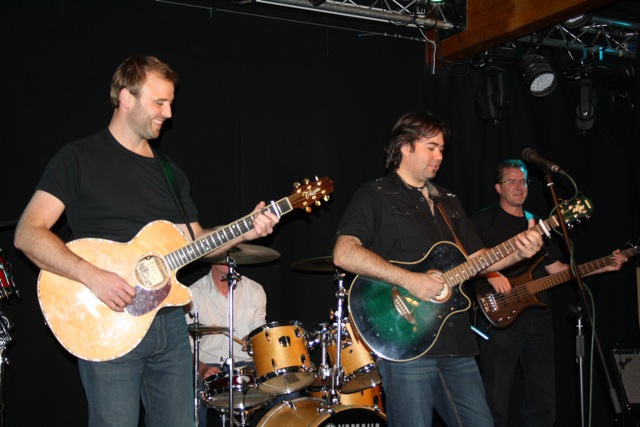
An image map is used for placing multiple links on a single image. For example on a medical site, where a photo of the human body could have links to different pages when different parts of the body are clicked, or in the example I've made below where each member of the band has his own biography page.Insert your image into your page using Insert > Image or clicking the Tree symbol from the Insert panel.
Select the image with the Properties panel open.
You will find in the bottom left corner of this panel the Map with a text box and 3 icons under it.

Give your image map an appropriate short simple name (without spaces) in the text box.
Now click on one of the three Hotspot drawing tools: Rectangular, Circle and Polygon.

Draw your hotspot area (which on clicking should go to a particular link). Hotspots are links with location co-ordinates on the image. Give the link details (Link is a page from your website or a complete web address such as http://www.coastrock.co.uk), target (leave empty to replace current page, or choose _blank to create a new page or tab in the browser) and alt text tag (helpful for visually impaired and good for pleasing Google too).
After you have drawn and defined all your hotspots, click on the black arrow icon below the map name to get back to the arrow cursor. Try the example below. (Note that the hotspots are invisible to your user's browser - if you want them to show you will have to add suitable graphics in Photoshop or a similar image editing application).

Photo of Coast by Jed © 2010
