
To set up a site in Dreamweaver CS5 first choose Site>New Site (or choose Manage Sites if you have previously set up the basics and now you are ready to go live).

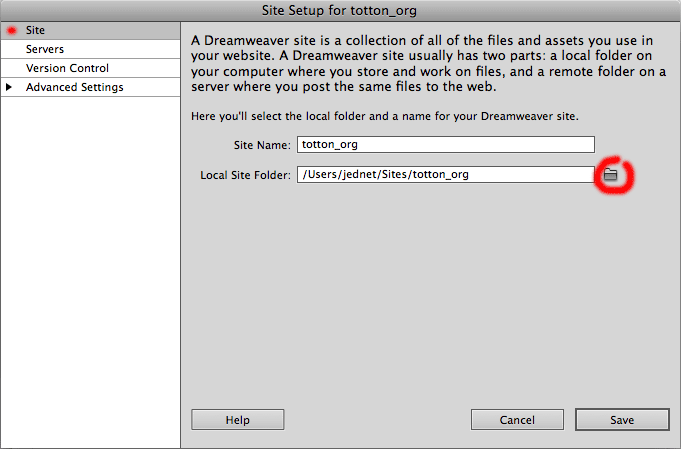
In the first section you just need to do 2 things:
- Give your site a Site Name. In the example below I have called it totton.org, call yours whatever_you_want. This name will be seen only by you and is just to allow you to work on this site rather than any others you set up later.
- You also need to make a folder or select an existing folder into which you will save everything that will become your live site. This is called your Local root folder. Click on the little folder symbol to the right of the Local Site Folder box (circled in red below) and browse to where you want to save your site - making a new folder if necessary. Open the folder and then select it. The whole site must be created within this single root folder. This should be given a short name preferably without punctuation or spaces and it's a good idea to get in the habit to avoid capital letters. All names for your web pages, folders within your site root folder, images and other media such as sounds and movies are best kept to these same rules.
- Don't use spaces, instead use dashes (hyphens -) or better yet hold the shift key as you type a dash to_produce_an_underscore. Spaces will show as '%20' when displayed in the browser address bar, it's a Unix thing. Links and particularly JavaScript functions such as rollovers can be very fussy about file names. JavaScript prefers names to start with a letter rather than a number. The three or four letter extensions that define file types such as .jpg, .gif and .htm or .html are very important and must not be changed.
That's all you need to do to start working on a site in Dreamweaver.
When you set up your sites at home or at work don't hide your root folder deep within other folders, keep it near the top of your disk directory, probably on your C drive if using Windows. At Totton College the C drive is not available to students and would limit you to working at the same computer every week. We will create our site root folders on the server space available to you on log in. All pages, images and media that you want to publish on the Web must be kept within the site root folder. Any source images such as scans and Photoshop.psd files, uncompressed sound .wav or movie .mov or .avi files and the editable Flash files which end with a '.fla' extension should NOT go into the site root, but instead into a parallel folder of 'source files'.
If you wish to work on your site at home you can take the site root folder and its contents away on a USB stick or e-mail it to yourself. You will have to set up your home copy of Dreamweaver to recognise the site by giving it a name and telling Dreamweaver where you have put the folder. It is possible to set up your site on a USB flash drive but if you do please copy the contents to hard drive storage regularly - USB drives are prone to corruption and even more likely to be left in a PC at the end of the evening, never to be seen again.
When you are ready to go live with the site you need to define a new server where your site will be published by clicking on the '+' symbol (circled in red below) in the Servers tab:
The 'Connect Using' dropdown menu should already be set to FTP (File Transfer Protocol, the most common way to upload files from your computer to a Web server that will be on 24 hours a day, 365 days of the year hosting your site... hopefully!). Fill in the blank boxes exactly as below, being very careful with the password.
Note the password is: J _ _ _ _ _ _ _ _ _ _ 1
(After the initial capital J, all the letters are lowercase with no spaces, and the last character is a numeral 1)
June 2016 server migration: all ftp info and passwords unchanged except log in Username now set as
totton@totton.org (not simply totton)
For the 'Root Directory' box enter t2/yourfolder_name rather than the web2/respect in the example screenshot.
At college we have to Use Passive FTP, which is an option hidden by the little black triangle to the left of More Options - clicking the triangle reveals the extras, but this is usually fine as it is the default setting in CS5:
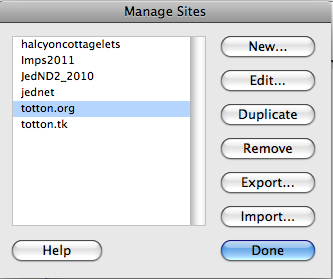
Then click OK, and when the list of your sites appears, click Done:
 |
If all is well so far your local site will be shown in green in the Files palette that is usually in the bottom right of your Dreamweaver screen. Click on the Expand icon circled in red and the Files palette will expand to dominate your screen: |
 |
You should now see a list of your files on your computer's hard drive in your Site Root Folder (by default these files stored locally are shown on the right) and now click on the plug and socket symbol (circled in red below) to connect to your live server space. |
if everything has been entered correctly and you are able to connect, then on the left should be listed any files that you have previously uploaded to your live Web site. If there is nothing there yet you can upload your entire folder by selecting it on the right hand side and clicking the Up arrow to PUT it on the live host.
If you are trying to work on your live site for the first time and have nothing yet on your computer's drive, click on the main folder symbol and then click the green down-pointing arrow to download your live site to your computer so that you can work on it. Once you have downloaded your files you can then click on the expand icon a second time to restore the Files palette to its usual place at the bottom right of your screen.
Open a page to work on. When you have made changes, save the file and then Put it up to your live site by clicking on the Get/Put File Management icon at the top of your page and choose 'Put'.

If you have only made changes to text then there is no need say yes to to 'Put dependent files' in the dialogue box that comes up. If you have added images or made changes to an external Cascading Style Sheet then say 'Yes'.
Check your live page in a variety of browsers, refreshing after each change to see it.